import Graphics.Gloss
が最初の行にあるので、まずは、Graphics.Glossについて調べてみよう。
gloss-1.7.8.1: Painless 2D vector graphics, animations and simulations.
haskell.orgのちゃんとした正式ドキュメントと、前回書いたものを比較してみよう。
Webから実行したときのプログラムがこれ。
import Graphics.Gloss
picture = circle 80
そして、Graphics.Gloss のページのサンプルプログラムがこれ。
import Graphics.Gloss
main = display (InWindow "Nice Window" (200, 200) (10, 10)) white (Circle 80)
mainがあって、displayの後ろのごちゃごちゃあって、最後に (Circle 80) とある。
まずは、これをそのまま sample.hs としてソースプログラムを作っちゃって、実行してみよう。
$ cat sample.hs
import Graphics.Gloss
main = display (InWindow "Nice Window" (200, 200) (10, 10)) white (circle 80)
$ ghc sample.hs
[1 of 1] Compiling Main             ( sample.hs, sample.o )
Linking sample ...
$ sample
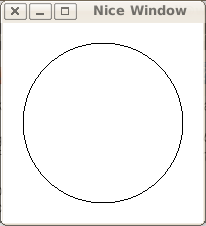
出来上がった sample を実行すると、次のウィンドウが画面左上の方に出た。

さて、 display について調べよう。
displaySource
:: Display    Display mode.
-> Color    Background color.
-> Picture    The picture to draw.
-> IO ()

Open a new window and display the given picture.
との説明があった。
さらに、 Display については、
InWindow String (Int, Int) (Int, Int)
Display in a window with the given name, size and position.
とあった、 InWindow の直後の文字列が、ウィンドウの名前になるようだ。
実際、sample.hs では、”Nice Window”としていたのが、ウィンドウのタイトルバーの位置に示されている。
最初の (Int, Int) がウィンドウのサイズ、次の (Int, Int) がウィンドウの位置である。
そして、display の第2パラメータが white になっていたが、これは背景色。
display の第3パラメータに指定されたもの(Picture)を表示する。
ここでは、Circle 80 である。
ということで、sample.hs を少しだけ書き換えてみた。
import Graphics.Gloss
display = circle 80

main = display (InWindow "Nice Window" (500, 500) (10, 10)) white display
WebからGlossを使うときには、このようになっているソースの最後のmainの行を除いた部分をWebで入力するのだろう。
このままでは、図形が1つだけしか描けない。
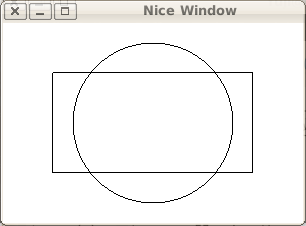
複数の図形を描くには、次の様にするとよい。
picture = pictures [
      circle 80,
    rectangleWire 200 100 ]
カンマ(,)で区切って、[]の中に並べると、それらを描いてくれるようだ。
$ cat sample2.hs
import Graphics.Gloss
picture = pictures [
      circle 80,
    rectangleWire 200 100 ]

main = display (InWindow "Nice Window" (300, 200) (10, 10)) white picture
$ ghc sample2
[1 of 1] Compiling Main             ( sample2.hs, sample2.o )
Linking sample2 ...
$ sample2
年内に何とかGlossで絵が描けるところまでできたので、安心して年が越せる。
最初の授業がまだ終わらないのだが、長くなったので、残りは次回にしよう。


